


The Glow Finish: How to Use Growth & Strengthen Hair Oil as Your Last Step After Styling
That final step after styling can make your hair look either polished and put-together — or a little heavy and greasy.
The difference isn't the oil. It's how you apply it.
This is the exact method for using the Growth & Strengthen Hair Oil as a finishing step after styling — so you get that soft glow and smooth finish without weighing your hair down.
What the Glow Finish Is Actually For
This isn't a treatment step. It's a finishing step.
Use it when you want:
- Smoother ends
- Less frizz on the outer layer
- A softer look on curls or waves
- A healthy-looking sheen — not "wet hair"
Think: finish and polish, not more product.
The #1 Rule: Micro-Press Only
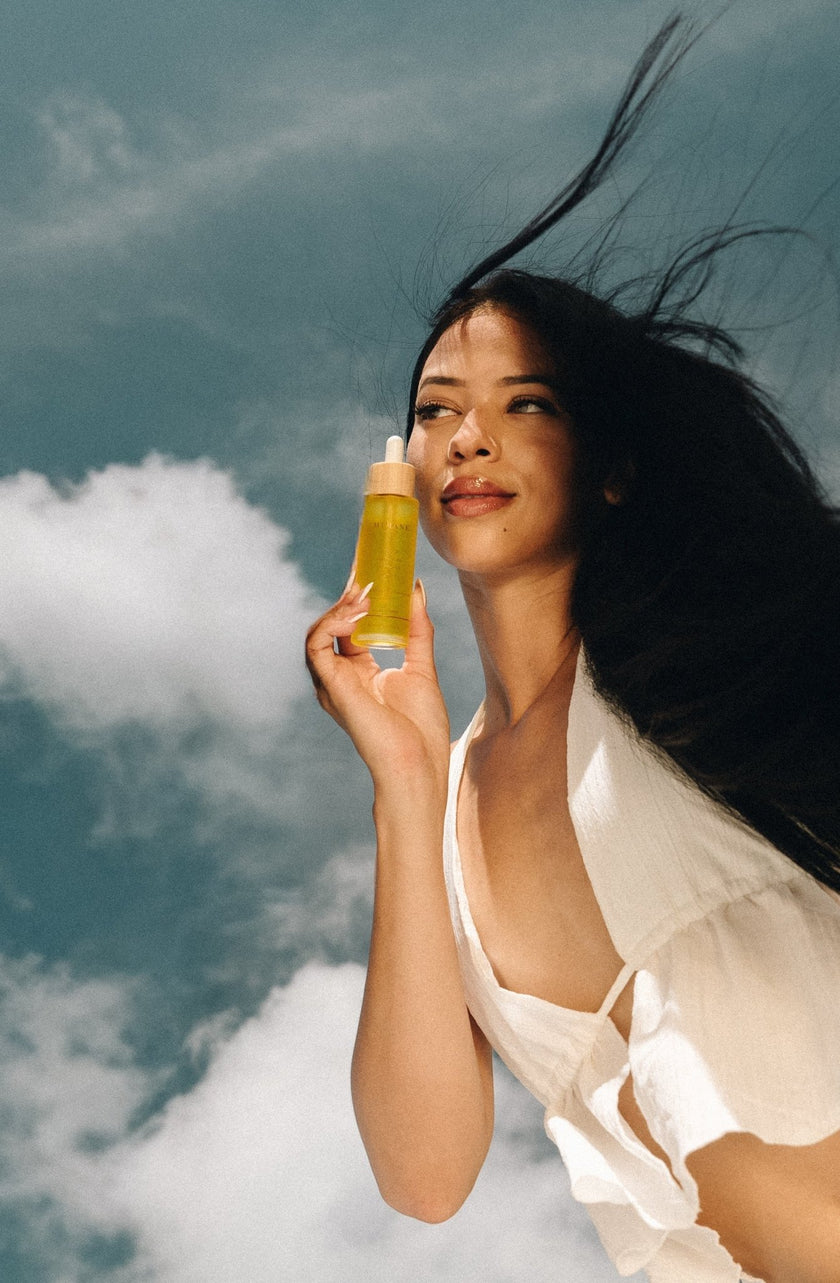
A micro-press is a tiny squeeze of the rubber top — just enough to release a small ribbon into your palm.
If you do a full squeeze, you'll almost always use too much for a finishing step. Always dispense into your palm first. Never straight onto styled hair.
The Exact Glow-Finish Method
Step 1: Start smaller than you think
- Fine hair: ¼–½ micro-press
- Medium hair: ½–1 micro-press
- Thick/textured hair: 1 micro-press, split across sections
Step 2: Spread it thin Rub palms together for 2–3 seconds, then run it across your fingertips too. You want a light film on your hands — not slippery oil.
Step 3: Ends first, always Lightly smooth over the last few inches. This is where shine belongs and where dryness shows up most.
Step 4: Outer layer only Using what's left on your hands, lightly glide over the outside of your hair — top layer, surface frizz, flyaways. Avoid the roots. Avoid pressing oil into the crown.
Step 5: Let it settle for 60 seconds This is what keeps it from looking oily. Let the oil distribute and disappear into the hair before you decide to add more. If you still need more, add only ¼–½ micro-press.
Best Use Cases by Style
Blowout Focus on ends and front pieces. One light pass over the top layer for flyaways. Don't touch the root area.
Curls Apply with praying hands on the ends, then gently scrunch once. Don't rake through curls — it breaks the shape.
Straight hair Ends first, a quick pass on the outer layer, then stop before it looks too shiny.
The Two Mistakes That Ruin the Glow Finish
Mistake #1: Oil straight onto the hair It creates one concentrated spot and makes the style look weighed down. Fix: palm first, spread thin, then apply.
Mistake #2: Adding more too fast Oil needs a minute to settle. If you add immediately, it stacks. Fix: wait 60 seconds, then decide.
If Your Hair Gets Greasy Easily
Use the "ghost hands" method:
- Apply oil to palms
- Rub hands together well
- Lightly smooth the ends using almost-dry palms
You'll still get softness and shine — just ultra-light.
What the Glow Finish Should Look Like
You did it right if:
- Ends look smoother and healthier
- Hair has a soft sheen, not a wet shine
- Flyaways look calmer
- Hair still feels bouncy and light
That's the Glow Finish: polished, soft, and effortless.


